Guys! It's Friday-eve! Yay! I'm so glad the weekend is almost here. Seriously, so glad! Anyway, I have my May Rainbow Honey mystery bag today - I started getting the Just Nails one. I like the bath and body stuff, but don't go through it quickly, so I need to work my way through my current stockpile before I get any more. So, in this mystery bag, I received three full size polishes.
First, I have to show you Ruby Sparkler. It is a gorgeous red full of amazing gold shimmer. I did two coats here, and the formula was great.
This, is Lemon Sparkler. This polish is a creamy lemon yellow filled with iridescent shimmer. This is two coats. It has the same formula as Ruby Sparkler.
This last one is my personal favorite of the three. I love glitter-filled crellies so much. Islands In The Sky is a pale blue crelly with white, purple, and green glitters. It had a great formula as well. This is three thin coats. I wanted layers of glitters. :)
Thank you so much for looking. I'll be back in a couple days with my next mani for the Nail Tarts challenge!
Showing posts with label Yellow. Show all posts
Thursday, June 16, 2016
Saturday, May 7, 2016
40 Great Nail Art Ideas - Floral
Hi everyone! Today, I have some floral nailart for you as part of this week's nail art challenge. I decided to go with some stamping and dotting since I am struggling with time management lately. :P
I used Heather's Hues It's Witchcraft for my base. It's a really pretty purple with blue shimmer. I stamped using Mundo de Unas Yellow and Cici&Sisi plate 19, then added dots in the center of each flower using Zoya Kimber, and Pretty & Polished Aquaholic and Appletini.
Here is what It's Witchcraft looks like on it's own. It is quite thin and sheer, so I ended up doing 4 coats for this. I probably could have stopped at 3, but added another coat after I accidentally smushed a nail. :)
Thank you so much for looking at my blog today. Please make sure you check out what all the other ladies did for this week's prompt!
Saturday, March 26, 2016
40 Great Nail Art Ideas - Spring
Hello! So I feel like every idea ever in the history of time when it comes to Sprig manicures has been done. So, of course, I was over here struggling to think up something new. Well, I don't have anything new. Everyone knows what Spring entails. Every Spring-like mani has been done. So, I'm just doing what I like, and what reminds me most of Spring. And guess what? It's baby ducks. I literally just got a little shiver of excitement typing that. You guys, I love baby ducks so much I can hardly stand it!!! They are so cute, in their cute little line behind their mama. So, I decided to paint that on my nails.
I started off with OPI My Pal Joey from the Hello Kitty Collection. After that, I hand painted the mama duck and the little babies using Pure Ice SuperStar! and Black Rage, Essie Meet Me at Sunset, and Sally Hansen Mellow Yellow.
Here is what My Pal Joey looks like on its own. It is a thin polish, but surprisingly this is only two coats. I was skeptical after the first thin and streaky coat, but it looked fine on the second. I love how bright it is, too. It's a perfect nail color for Spring!
There you have it. Baby ducks = Spring. And I loooooove baby ducks! My husband will take me out to the park where there is a big pond to take pictures of baby ducks. That is the tradition. I will take like a hundred pictures. It will be great. So, I guess that is all I have for you today. Please make sure you check out what everyone else did for their spring manicures!
Labels:
40 Great Nail Art Ideas,
Black,
Blue,
essie,
Freehand,
Nail Art,
OPI,
Orange,
Pure Ice,
Sally Hansen,
White,
Yellow
Wednesday, November 25, 2015
Thanksgiving/Fall Nailart
Hi everyone! I have some Turkey Day nailart for you today. It is really just a fall manicure, but it feels festive to me! Since I have lots to do, this is going to be a short post - mostly pics!
I used Butter London Chuffed for my base, then stamped over top using Mundo de Unas Yellow and Reddish. The stamp I used for the leaves pattern is Bundle Monster's BM-H11. The acorn was a fail, but there is no time for a redo. I made the mistake of not testing it out first, and the brown polish I tried to use was no good...so I just stamped over top with a different brown thinking I could line it up, but I was sorely mistaken! Haha! The acorn image is from BM-H12.
Here is what Chuffed looks like on it's own. So much lovely gold shimmer peaking through this orange jelly! This is three thin coats.
Thank you so much for looking. Have a happy Thanksgiving, and I will be back this weekend!
Labels:
Brown,
Bundle Monster,
Butter London,
Mundo de Unas,
Nail Art,
Orange,
Red,
Revlon,
Stamping,
Yellow
Friday, October 2, 2015
40 Great Nail Art Ideas - Hobbies
Yahoooo! Today is the day we kick off the newest Nail Tarts challenge. I'm super excited about this one, because this time, I am actually helping to run the challenge! This one will be lasting a full year, just like the last one. We will be posting nail art ideas following a specific theme every week. We'll be sharing on pinterest, IG, facebook, and of course through our blogs what everyone does for each prompt to share *at least* 40 great nail art ideas with the world. :) Today's prompt is hobbies. And wouldn't you know, I got stuck on the very first prompt haha. I have two hobbies at the moment: (you know it changes month to month haha) nail art and video games. You all know I love nails (duh!) and I bet a lot of you have noticed my sick obsession with certain video games and my beloved xbox. So, I finally decided to show my love for BOTH of these and did this rainbow stamping mani as an ode to my two favorite hobbies.
I started off with some polishes I have just been DYING to wear since I bough them. These are from Polish Addict Nail Color's July box - United 4 Pride. These were released just after marriage equality for all couples was upheld by the supreme court. I had to get something to commemorate the historic occasion and polish was the perfect thing.
I stamped over top of these using Konad Special White and several different images from different plates. The hearts all come from Pueen: plates PUEEN43 and PUEEN41. The I heart nails image and the video game image are both from Bundle Monster: plates BM-401 and BM-415.
Side bar: I have a friend who is gay and when this was announced we were together and it was just the most momentous thing I can remember happening in a very long time. Someone asked him that day if we was going to go home and party and he replied "no, I'm going to go home and get MARRIED." I just about died. My heart melted. I mean, my husband is the most important man in the world to me (beside my dad lol), and if I did not have the right to marry him, and then after years and years of being together and never being able to make it a legal relationship, we finally got that right, I think my heart would explode. So, yeah, I got a little teary for him and his partner. It is special.
Anyway, when this particular collection of polish came out, I knew I needed it. And when they are all dried out and my kids ask why I have these old rainbow glitter polishes, I can tell them I was there when gay couples got the right to marry. It is right up there in history with women and minorities gaining the right to vote. It is huge. Look at these beauties.
Well, I'm super excited about this new challenge, and can't wait to see all of the other girls manicures for this first theme. Make sure you stop and look at what everyone else did!
I started off with some polishes I have just been DYING to wear since I bough them. These are from Polish Addict Nail Color's July box - United 4 Pride. These were released just after marriage equality for all couples was upheld by the supreme court. I had to get something to commemorate the historic occasion and polish was the perfect thing.
I stamped over top of these using Konad Special White and several different images from different plates. The hearts all come from Pueen: plates PUEEN43 and PUEEN41. The I heart nails image and the video game image are both from Bundle Monster: plates BM-401 and BM-415.
Side bar: I have a friend who is gay and when this was announced we were together and it was just the most momentous thing I can remember happening in a very long time. Someone asked him that day if we was going to go home and party and he replied "no, I'm going to go home and get MARRIED." I just about died. My heart melted. I mean, my husband is the most important man in the world to me (beside my dad lol), and if I did not have the right to marry him, and then after years and years of being together and never being able to make it a legal relationship, we finally got that right, I think my heart would explode. So, yeah, I got a little teary for him and his partner. It is special.
Anyway, when this particular collection of polish came out, I knew I needed it. And when they are all dried out and my kids ask why I have these old rainbow glitter polishes, I can tell them I was there when gay couples got the right to marry. It is right up there in history with women and minorities gaining the right to vote. It is huge. Look at these beauties.
The colors used in this manicure are Polish Addict LGBT (pink), 6/26/15 (purple), Love Is Love (blue), Love Wins (green), and United 4 Pride (yellow).
Well, I'm super excited about this new challenge, and can't wait to see all of the other girls manicures for this first theme. Make sure you stop and look at what everyone else did!
Tuesday, September 1, 2015
Kawaii Kitty Nailart Tutorial
Hello! I received a lot of love for my
kawaii kitty nailart I entered into the Barielle nail art contest. I totally
got runner up which is HUGE for me, so thanks to everyone who voted. You are
all awesome and I love your faces! :) Anyway, I had received a few requests for
a tutorial and I actually photographed the whole process intending to share a
tutorial, but these photos took forever for me to edit into a collage. I kept
having to put it off in favor of more new nail art posts. But finally, the time
has come, and it is here. Take a look.
Ok, so step 1 is easy: paint a big circle toward the tip of your nail on your middle finger (if your nails are shorter, it will be almost centered, but be sure to leave room for those cute giant ears!
Step 2: Add two triangles for the ears - I try to make them "rounded" triangles to look more like cat ears
Step 3: paint a small rectangle below for the kitty's neck
Step 4: Add small rectangles on the index and ring fingers on the edges closest to the kitty's face
Step 5: With a dotting tool, place two dots next to eachother, directly opposite the edge of your rectangle. Then, place a dot on either side, connecting to the kitty's arms...or technically legs.
Step 6: Fill in the empty space between the toes with the same colored polish
Step 7: With black polish and a detail brush, paint a U shape, then draw a line across the top of the U to form the mouth
Step 8: To draw the eyes, draw two Vs, with their opening facing away from the mouth. Then add two straight lines directly between the mouth and sides of the face on both sides. These are the kitty's whiskers.
Step 9: Grab a pale pink polish, and using your smallest dotting tool, make a dot within each "toe" on both of the kitty's paws. Using a larger dotting tool, place one pink dot in the center of each paw to create the pad. Then, use a brush to to paint two pink lines under the eyes, and add a small dab of pink withing the mouth for the tongue.
Step 10: I left this out, but with the polish used for the main parts of the kitty, add a squiggly line to your nail on your little finger for his tail. You will also need to use your black polish to fill in the kitty's mouth. Topcoat those nails, and you are done!
Here is what the final product will look like. Play with color, and please share your manis with me on social media if you try out this tutorial!
Wednesday, August 19, 2015
Mickey Mouse Nail Art with Creative Cuticles Of Mice And Merlin
Hello! Oh boy I have been busy lately, so sorry about the lack of posts, but I am working on some new nail art tonight, which I will probably have posted tomorrow night or Friday morning. :) Today, I have a mani I did for a coworker who is going to Disneyland on Thursday. I had just bought this polish from Creative Cuticles when I found out she was going and told her more or less, she pretty much NEEDED it for the trip. We sat down at lunch last Friday and I painted these little sorcerer Mickeys on her ring fingers and then added two coats of Of Mice And Merlin to every other nail.
The base colors used for this are Sally Hansen Mellow Yellow and Julep Margaret. I painted Mickey using Pure Ice Black Rage and SuperStar!, Revlon First Class, and Julep Clara. Now I have my fingers crossed they last through her whole vacation!
Thank you so much for stopping by. I'm really starting to quite like doing other people's nails. It's fun and a great lunch time de-stresser. :)
Labels:
Black,
Blue,
Creative Cuticles,
Glitter,
Julep,
Nail Art,
Pure Ice,
Revlon,
Sally Hansen,
White,
Yellow
Saturday, August 15, 2015
Summery Pineapple Nail Art
Hey guys, here I am sliding in my challenge post for my stamping group at the last possible minute - as usual! Oh my goodness, I posted so much more than I usually do this week, and it has taken a lot out of me! The prompt for this half of the month was Yellow and Orange/Summer Treats/Decals. Oh my, that is specific, but I finally came up with something to fit the prompts.
I started off with a gradient using Julep Marjorie and Orly Sunset Peach, and then added a coat of Northern Lights topcoat for some extra sparkle.
After that, I created some decals using BM-713 with Konad Special Black, then colored in the pineapples with Zoya Pippa. I slapped those decals on top of my gradient, and then added topcoat.
Thank you so much for looking! I'll be back Monday with another mani and sometime next week, I'll share my August Rainbow Honey Mystery Bag!
Wednesday, August 12, 2015
Kawaii Kitty Nails for Barielle's Nailart Contest
Good evening! It's late, but I have to share with you these cute kitty nails I did tonight for a contest being held by Barielle. I took tutorial photos too, but don't have enough time to edit all of those now, so I'm just posting the mani itself, plus a swatch of the base color I used. Check this out!
Eeep! I can hardly stand my own handiwork! Seriously, every time I look at these I can't help but burst into a gigglefit over the ridiculousness/cuteness of this nailart. If you like these, I woudl be forever greatful if you VOTE for them over at the contest site!
I started off with Barielle Soul-er Powered for my base. The purple polish used for the cat is Barielle Welcome Ohm, and the pink polish is Barielle Gel-ous Lover. I used a Pure Ice Black Rage for all of the black accents.
This is what Soul-er Powered looks like on it's own. It is a shimmery, golden yellow polish and has a great formula. This is 2 coats shown below.
Thank you so much for looking. I'll edit this tomorrow night with a tutorial, and then I'll be back Friday with a new post!
Sunday, August 9, 2015
SinfulColors "A Class Act" Back to School Collection 2015 (partial)
*items in post provided in exchange for my honest review
Good morning. I have 10 polishes from SinfulColors' back to school collection. They sent me these for a review and I am more than happy to share. This is a brand you can find at a lot of drugstores, as well as Walmart and Target. They are usually $1.99, which is sinfully cheap (see what I did there??) despite the fact that they are great polishes.
I was interested in the white and black polishes because I'm always looking for a good, opaque white. Once I opened the package, I realized these were demi-matte finish polishes, and am excited to add a matte white to my collection. Whiteboard is decently opaque. It only took two thin coats here (which is good for white), and dried to a matte finish, so it looks kind of like chalk to me. The formula is great. There was no dragging or pulling, and it was just nice and smooth.
I tried topcoating it too, to see how it would look shiny, and decided it would definitely work well for a white base in nail art. I used one coat of Out The Door topcoat here.
Blackboard is actually not black, but in fact, looks just like the color of a blackboard. It is a dark grey-blue; the color of slate. It is a very thin polish, and took three coats to become opaque. This one dried to a matte finish as well, and looked exactly like a chalkboard once dry.
I had no issues with the formula on this one until I tried to topcoat it. It did not play nice with Out The Door Topcoat. It "ate" the topcoat the way some glitter polishes do, and only it spots, so that the finish was matte in some places and shiny in others. It was weird. However, I tried again with my trusty Seche Vite, and that had no problem. Nice and shiny and smooth. It's easier to see here that the shade is not a true black.
I couldn't resist doing some chalkboard nailart, so I did this with these two colors! Cute, right? The plate I used is BM-H23. Whiteboard is not quite opaque enough for typical stamping, but it was perfect to give the look of chalk on a blackboard in this mani. Love!
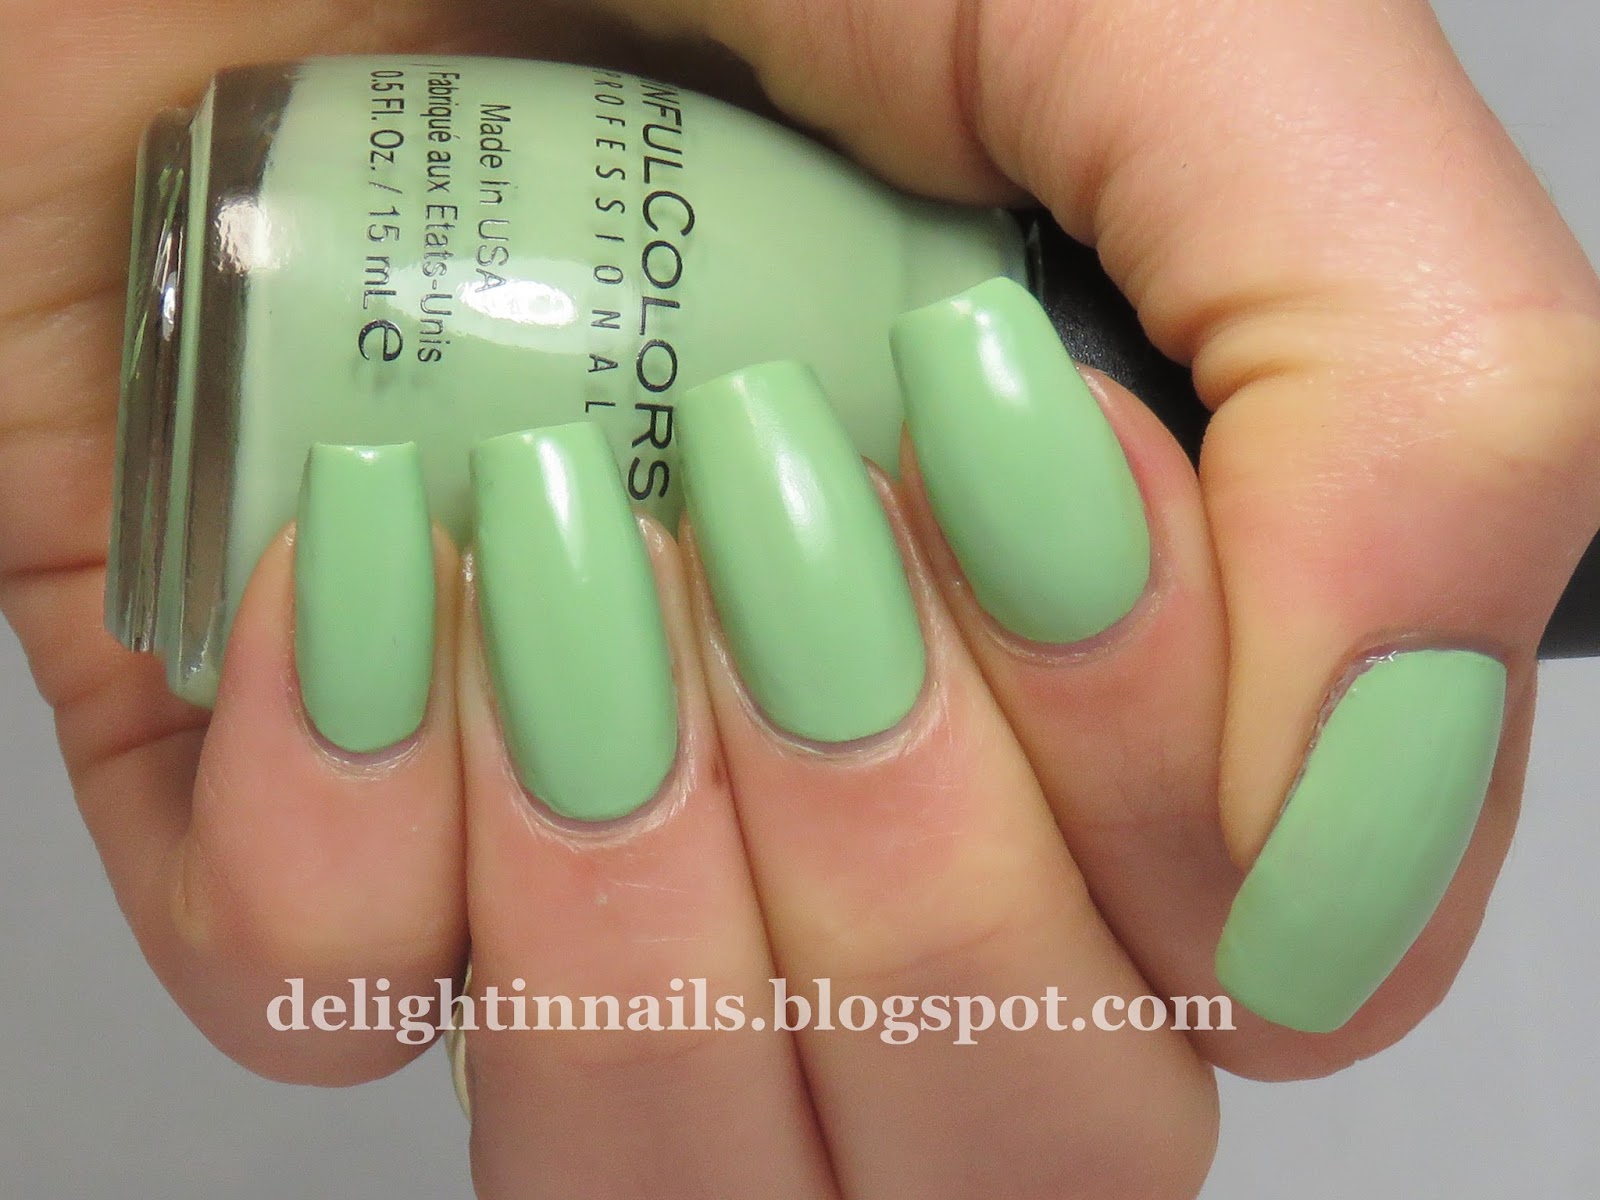
I received one more demi-matte polish from them called Chalk It Up. It is a pale green polish, and had the same formula as the other two. Nice and smooth, so no complaints here. :)
I topcoated this one with Out The Door topcoat with no issues. Here is what it looks like shiny.
Next, I have for you some of the shimmery colors from the collection. First up is Burst Of Fresh Flair It went on very smooth, but was quite thin. I did 4 thin coats here to build it up. I probably could have gotten away with 3, but I can't stand a visible nail line on me. It wouldn't matter for girls with short nails - they might even get away with only two coats! :) I really love this color. I have nothing like it, and can't wait to rock it in some spring manis come next March!
Next, is Purple Diamond. This one was almost as thin as Burst Of Fresh Flair, but not quite. It built up quickly, and ended up only needing three thin coats. Short-nailed girls could definitely just do two. You all know how much I love purples. This one is no exception. It is so soft and pretty. Like a princess's dress. Ooh like Repunzel from Tangled you guys!!!! Eeeeee!
The last shimmer polish I have from this collection to show you is Ice Blue. This one was identical to Purple Diamond in terms of formula. I did three thin coats here.
I received two brighter shades from them as well, so those are next. First, we have Daredevil. This is a hot pink with a blue shimmer. Nice formula, this is two coats with no topcoat.
Next, is Fig. This is a bright purple with a slight pink shimmer. It had a similar formula to Daredevil and went on in two easy coats. This is without topcoat.
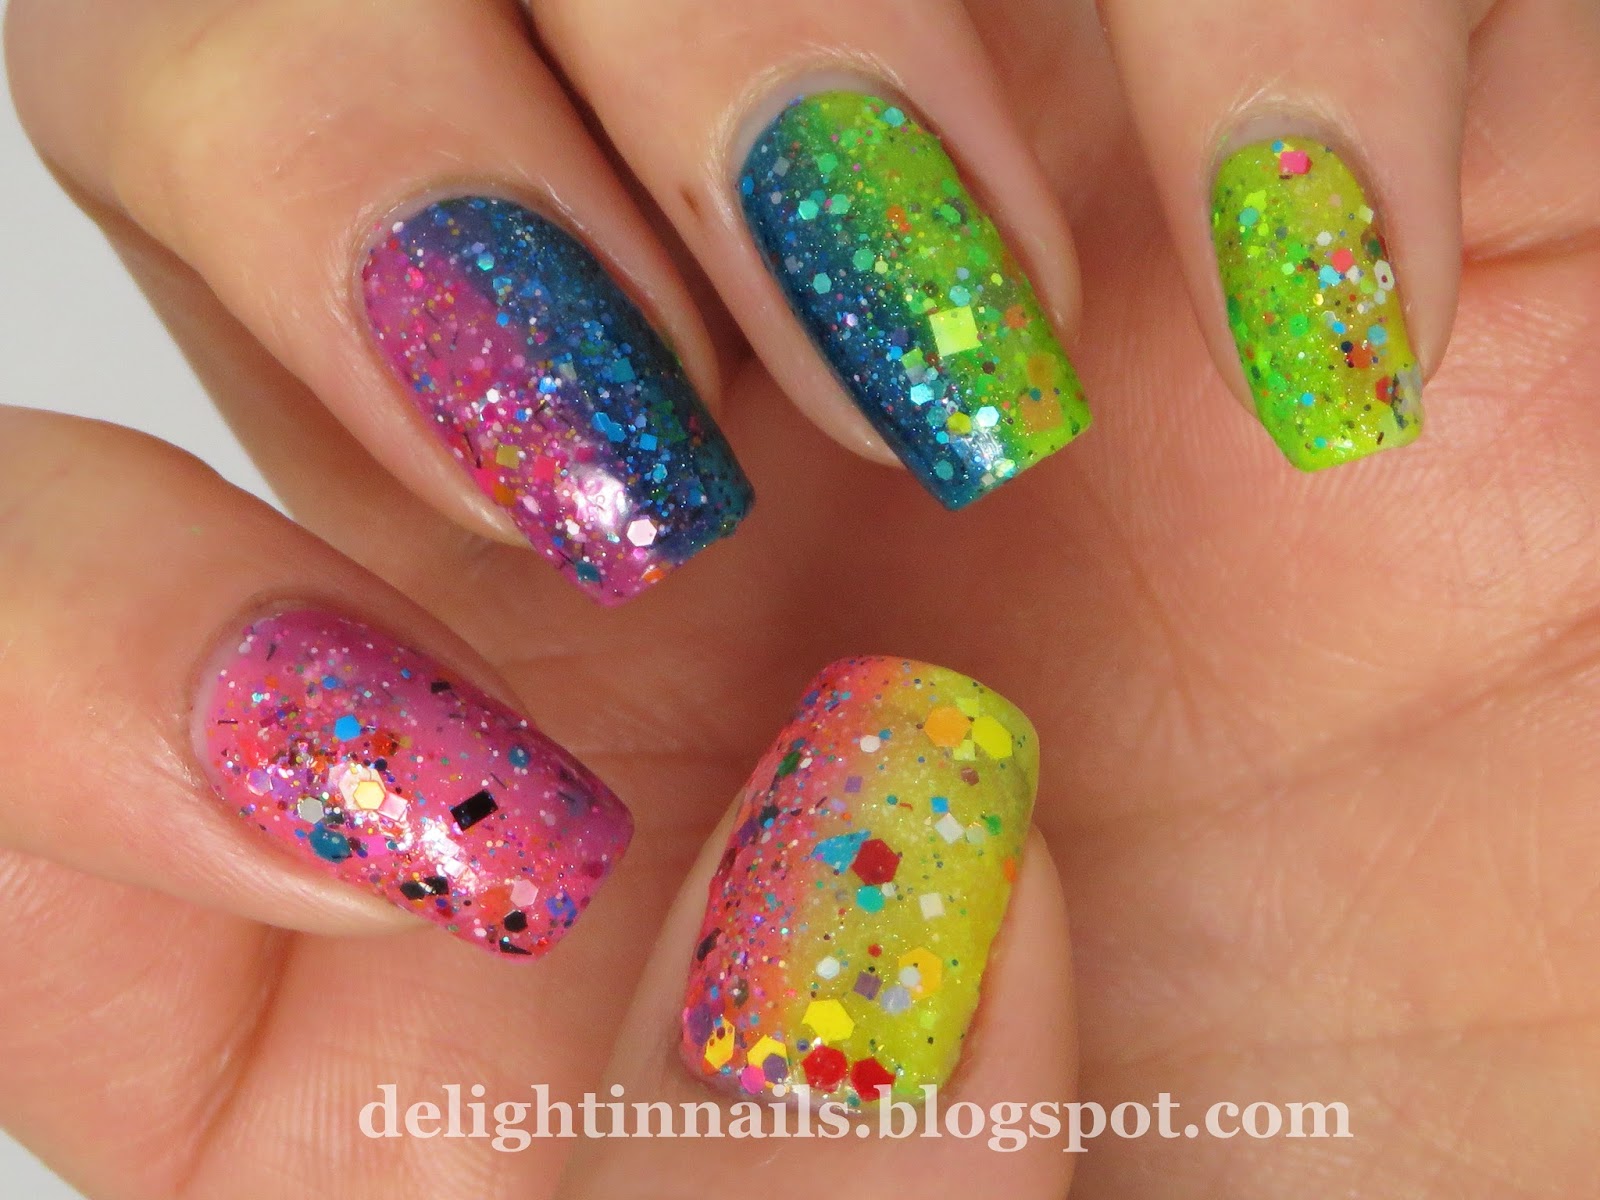
Last, I have the two glitters that I received. First up is the green/blue one, Late Night Haute. It is a blue tinted jelly filled with iridescent shard glitters, tiny holographic glitters, and iridescent blue bar glitters. This is two coats over Chalk It Up.
And the last polish I have to show you all is Night Owl. This is a pink tinted jelly filled with metallic blue bar glitters, tiny holographic glitters, and iridescent shard glitters. I did two coats here over Daredevil.
Thank you so much for checking out these lovely swatches. They are available now for the back to school season, and I highly recommend Purple Diamond. It was my favorite out of all of these! You can follow SinfulColors to find out more about their upcoming collections if you are interested.
Subscribe to:
Posts (Atom)